Listing Terminal Colors
If you’ve ever worked with colors in a modern terminal emulator you may occasionally find yourself looking for just the right index to use in its standard 256-color palette. The other day I was in the same situation, so I wrote a little Bash script to print a pretty preview of all the colors. Here’s some sample output from Terminal.app (using the “Novel” profile):
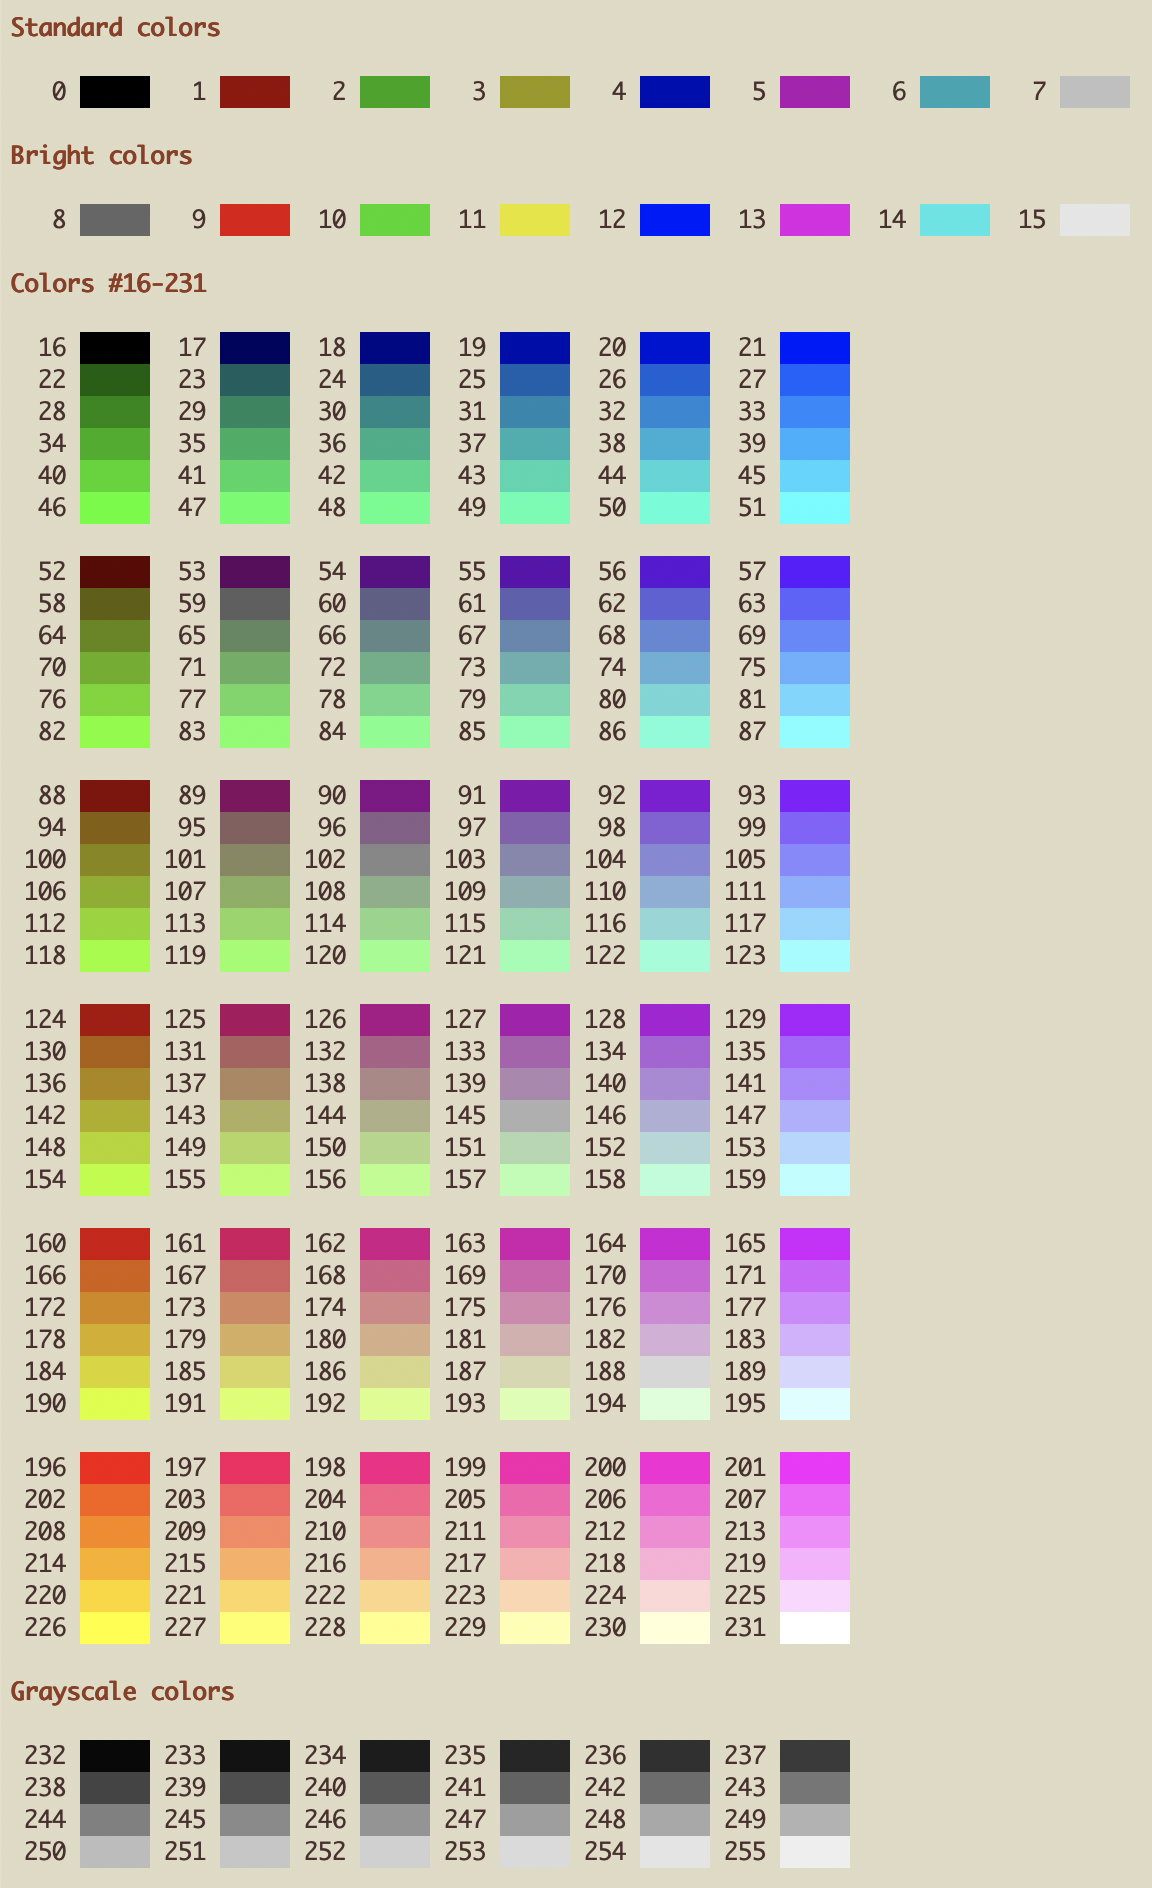
Not bad! Now you could just download the script and call it a day, but what’s the fun in that? 😊 If you’re game, let’s take a few minutes to go through the code together and figure out how it works…
First, we write a function to print each color index:
 7padding="   "
 8
 9print_index () {
10  index=$1
11  printf "%s%s" "${padding:${#index}}" " $index "
12}
On line 7, we create a new string (padding) of three whitespace characters. On line 10, we set the variable index equal to the first parameter ($1). Finally, on line 11, we print the index padded to a width of five characters. The result is right-justified, with a single space to the right of each index.
The syntax for the padding is a bit obtuse, so let’s break it down:
${variable}is a more explicit way of writing$variable, and simply returns the value of the given variable.${#variable}returns the length of the given variable. Because Bash variables are just character strings, this returns the number of digits in the index.${variable:offset}returns the value (substring) of the given variable starting from the specified offset.
So ${padding:${#index}} returns a string with the number of whitespace characters in padding less the number of digits in index. More specifically, this expression returns two whitespace characters if index has one digit; one whitespace character if index has two digits; and an empty string if index has three digits.
(For more details on this syntax, see the section on parameter substitution in the Advanced Bash-Scripting Guide.)
Next, we write a function to print each color:
14lut="\e[48;5;"
15reset="\e[0;39;49m"
16
17print_color () {
18  index=$1
19  printf "${lut}${index}m ${padding} ${reset}"
20}
On line 14, \e[48;5; is the start of an ANSI escape sequence, where
\e[is equivalent to theESCASCII control code (decimal value 27);48is the Select Graphic Rendition (SGR) parameter to set the background color; and5indicates that we are using a 256-color lookup table.
Similarly, on line 15, \e[0;39;49m is an SGR control sequence that resets all display attributes (0) before setting the default foreground (39) and background (49) colors.
(Note that the numbers in an SGR sequence are separated by semicolons and that a valid sequence must end in the ASCII character m.)
On line 19, we bring this all together to display a color patch. Building on the explanation above, we can describe what the expression ${lut}${index}m ${padding} ${reset} does as follows:
${lut}${index}mexpands to\e[48;5;${index}m, selecting the color at the given index from a 256-color lookup table.␣${padding}␣expands to five whitespace characters (the width of the color patch).${reset}expands to\e[0;39;49m, resetting all display attributes along with the foreground and background colors.
Now that we have our plumbing in place, let’s print the eight standard colors (indices 0–7) on a single line:
26bold="\e[1m"
27
28printf "\n${bold}Standard colors${reset}\n\n"
29for (( n=0; n<8; n+=1 )) ; do
30  print_index $n
31  print_color $n
32done
(Note that we’ve introduced a new SGR control sequence, \e[1m, to make the heading text bold.)
We can print the eight “bright” colors (indices 8–15) the same way:
38printf "\n\n${bold}Bright colors${reset}\n\n"
39for (( n=8; n<16; n+=1 )) ; do
40  print_index $n
41  print_color $n
42done
Next, let’s print the 216 colors (indices 16–231) in the middle of the lookup table:
46printf "\n\n${bold}Colors #16-231${reset}\n"
47for (( n=16; n<232; n+=6 )) ; do
48  (( (n-16) % 36 )) || echo ""
49
50  for i in {0..5}; do
51    print_index $(( n+i ))
52    print_color $(( n+i ))
53  done
54
55  echo ""
56done
216 colors won’t really fit on a single line, so we’ll take the fact that they are arranged in a 6x6x6 “cube” into consideration and print them in 6x6 blocks, instead. We iterate through the indices six at a time (line 47), adding an extra space before each 6x6 block (line 48) and printing each index followed by a patch of its corresponding color (lines 50–53).
Finally, let’s print the 24 grayscale colors (indices 232–255):
60printf "\n${bold}Grayscale colors${reset}\n\n"
61for (( n=232; n<255; n+=6 )) ; do
62  for i in {0..5}; do
63    print_index $(( n+i ))
64    print_color $(( n+i ))
65  done
66
67  echo ""
68done
Once again, 24 colors won’t really fit on a single line, so we iterate through the indices six at a time (line 61), printing each index followed by a patch of its corresponding color (lines 62–65).
And that’s it! I hope you found this post to be helpful and/or edifying. Once again, you can download a copy of the script to use and modify as you see fit. Have a question or comment? Feel free to get in touch on Twitter or by email.
Happy coding! 👋